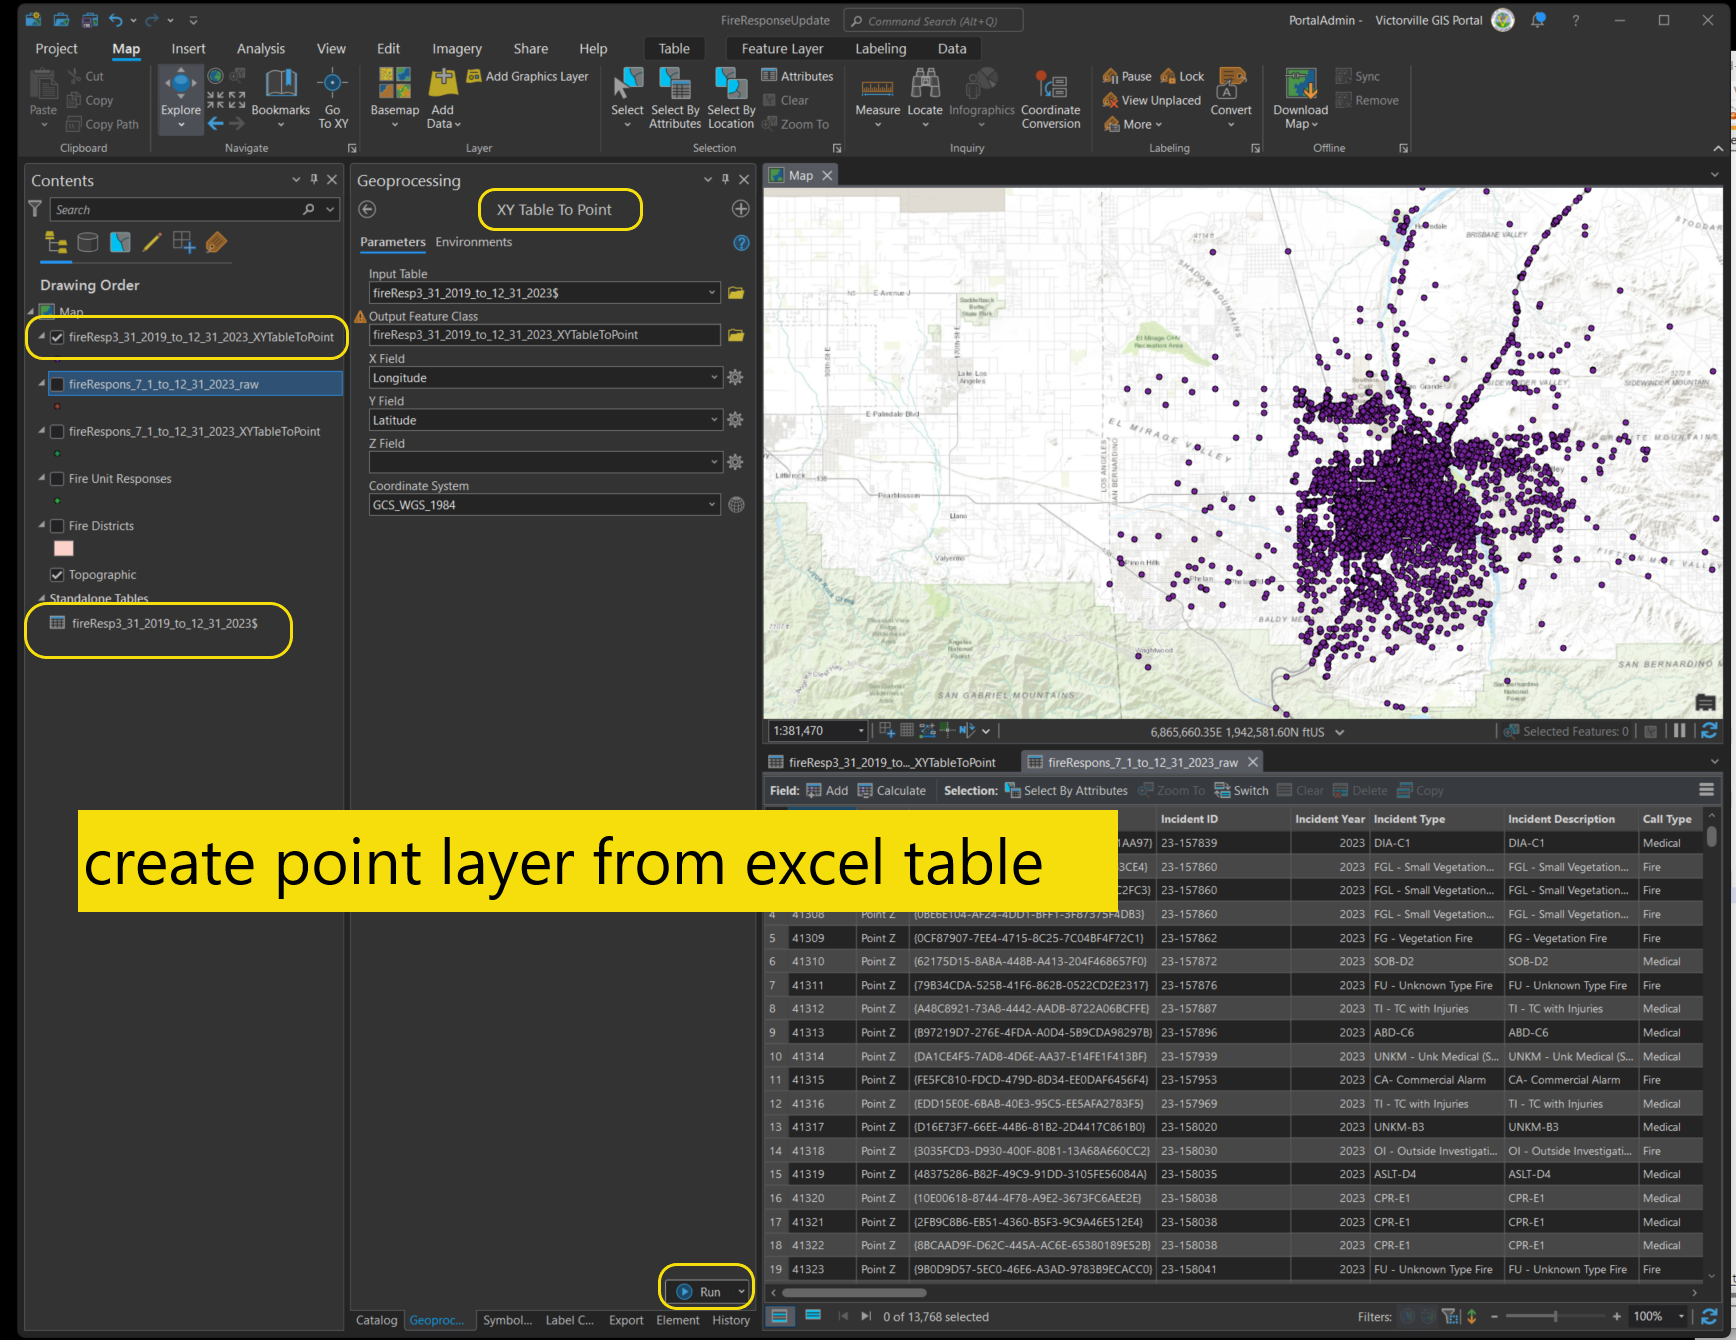
Step 1
create point layer from excel table
Step 2
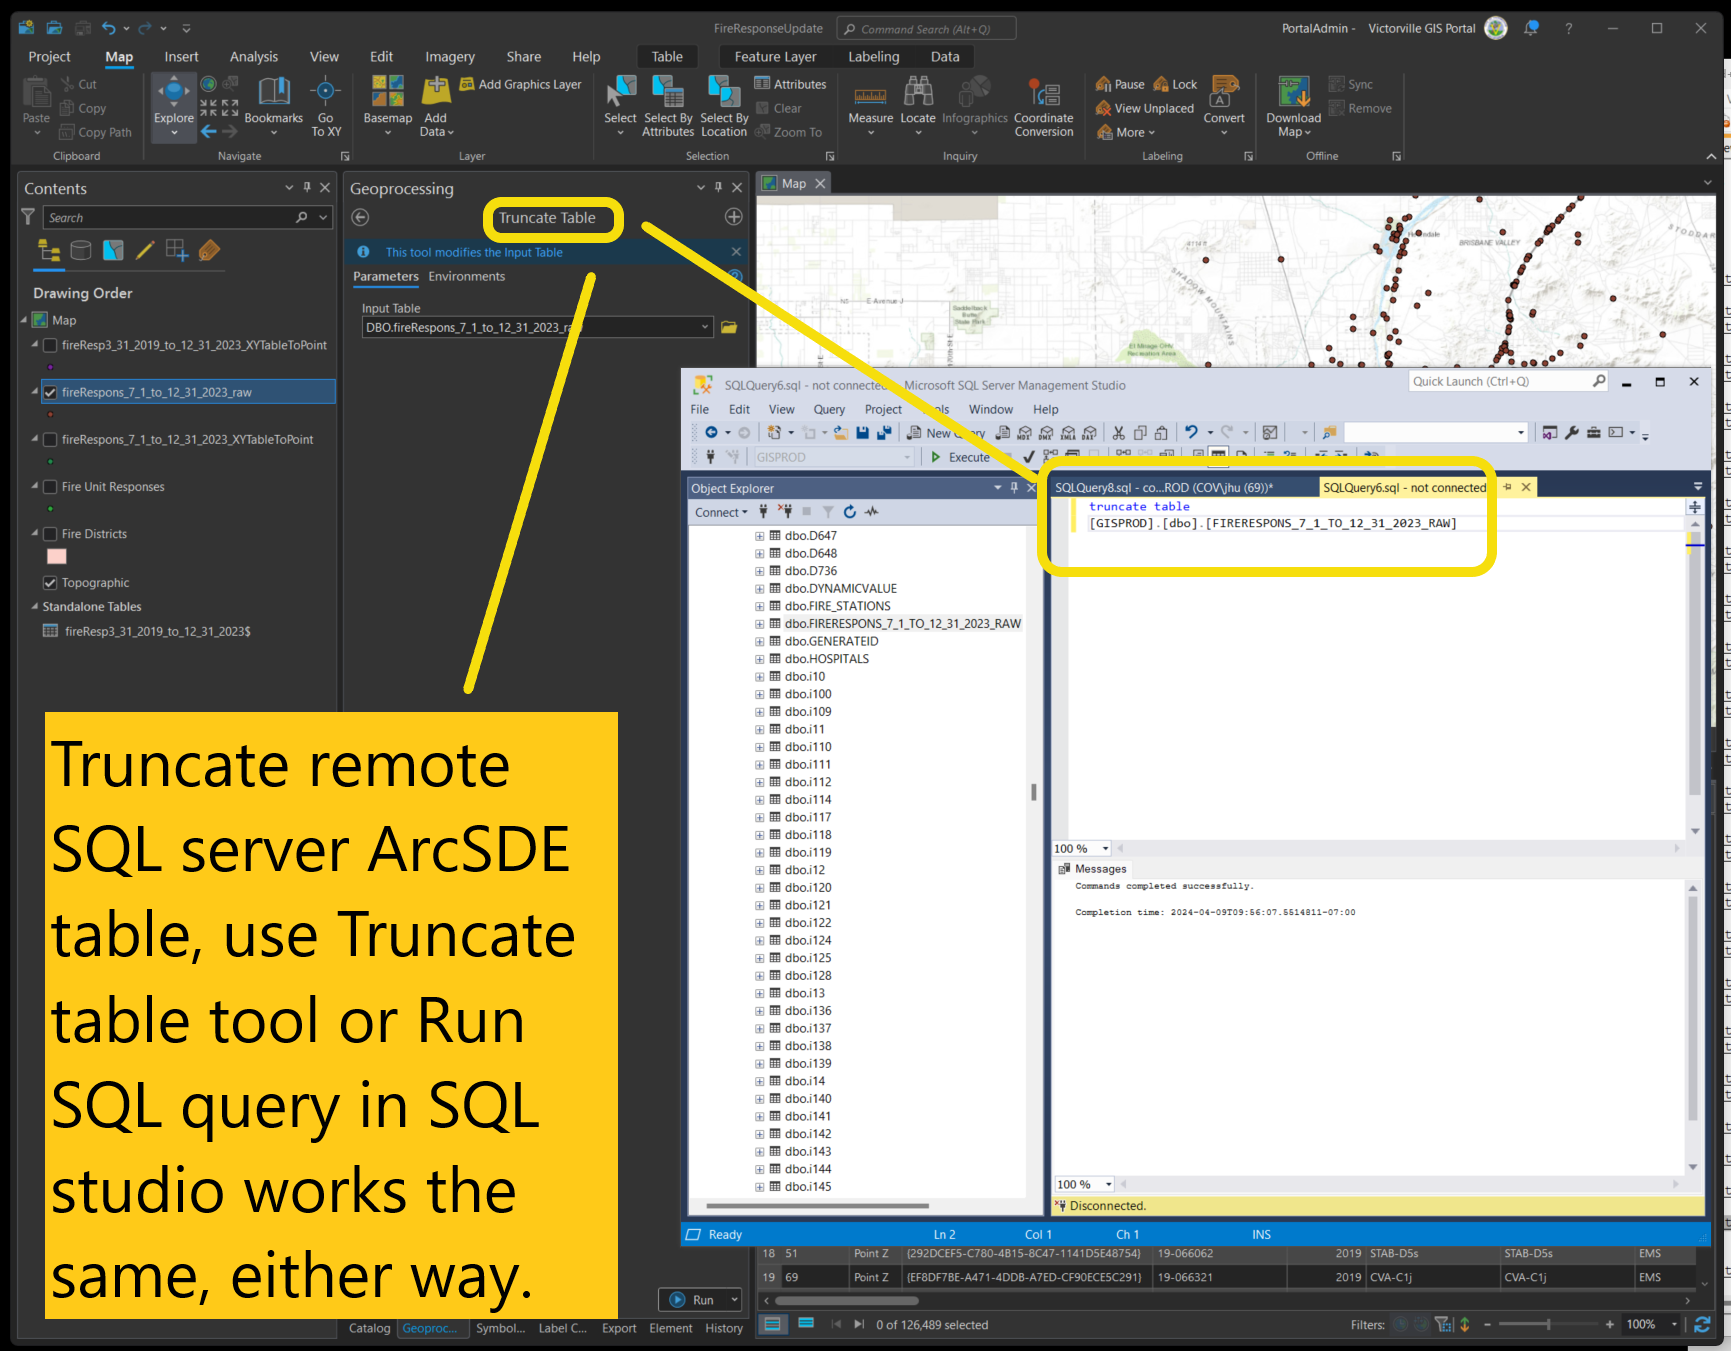
truncate xxxx_raw table, I will use this file geodatabase table as source to upload to remote SQL server ArcSDE table.

Step 3
Must do it in xypoint layer, before transfer to xxx_raw work around on domain fieldmapping
Unit response in city
Unit response in Management Zone
details see
https://transparentgov.net/cleargov1/1577/domain-fieldmapping-does-not-work-part-10-911-firstwatch
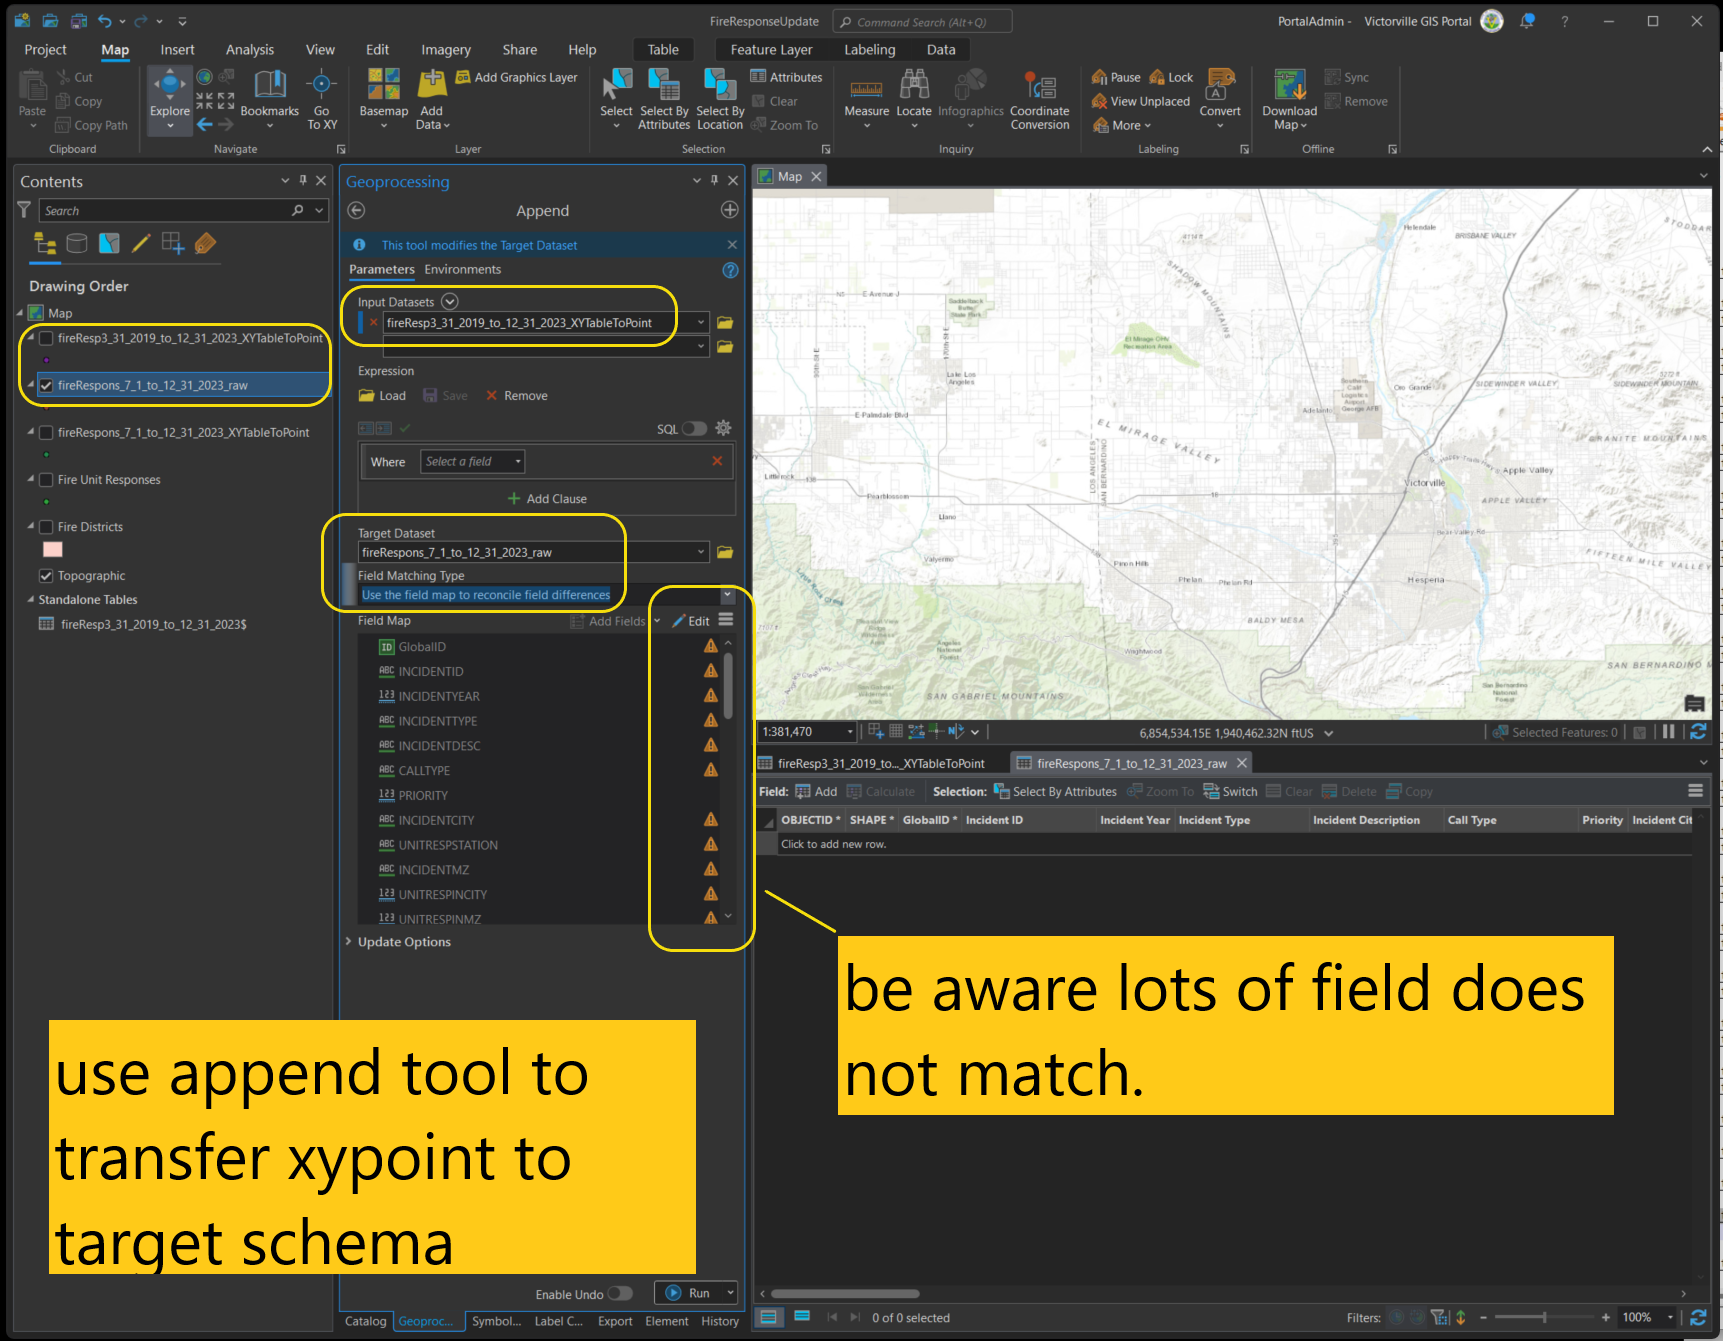
Step 4
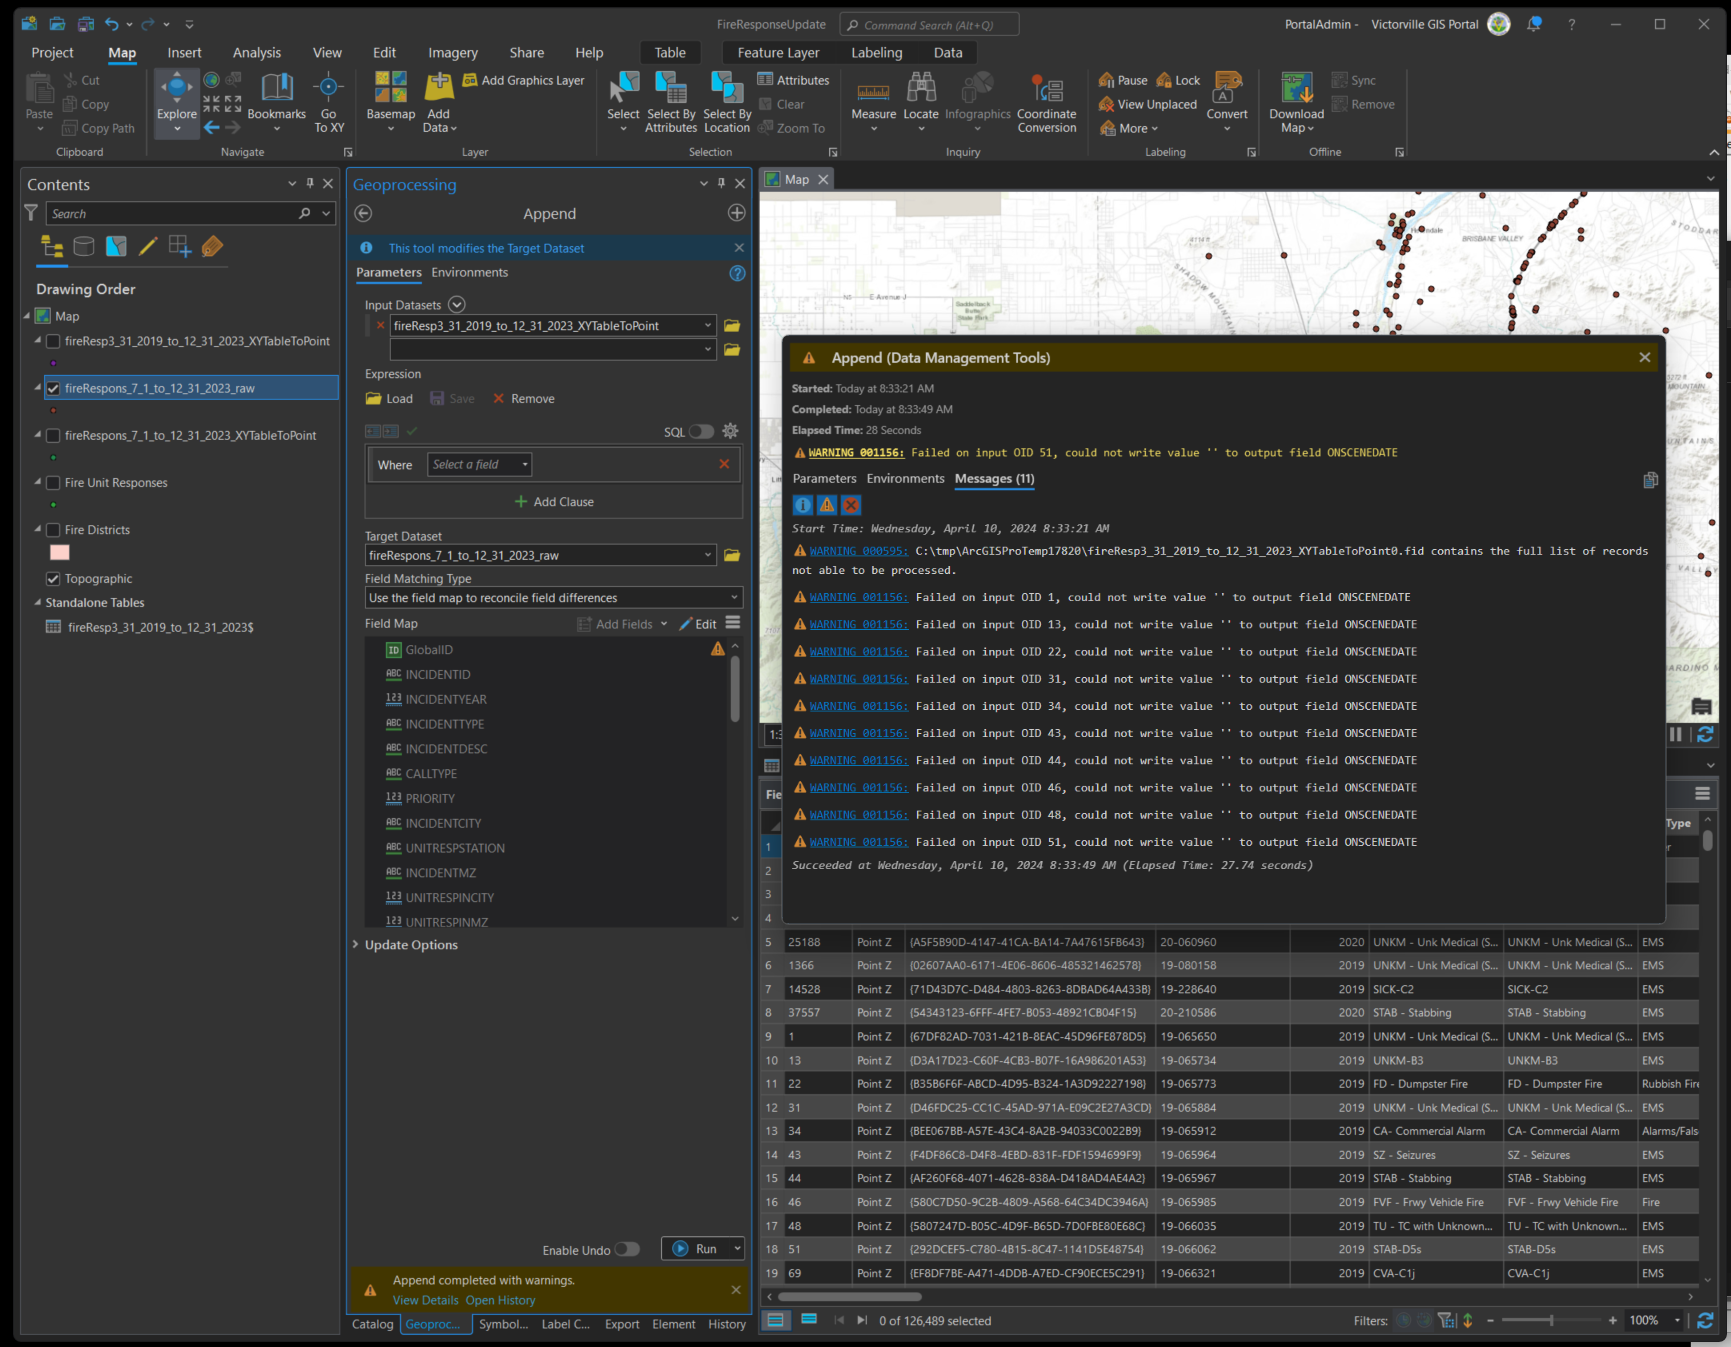
use append tool to transfer xypoint to target schema, be aware lots of field does not match.
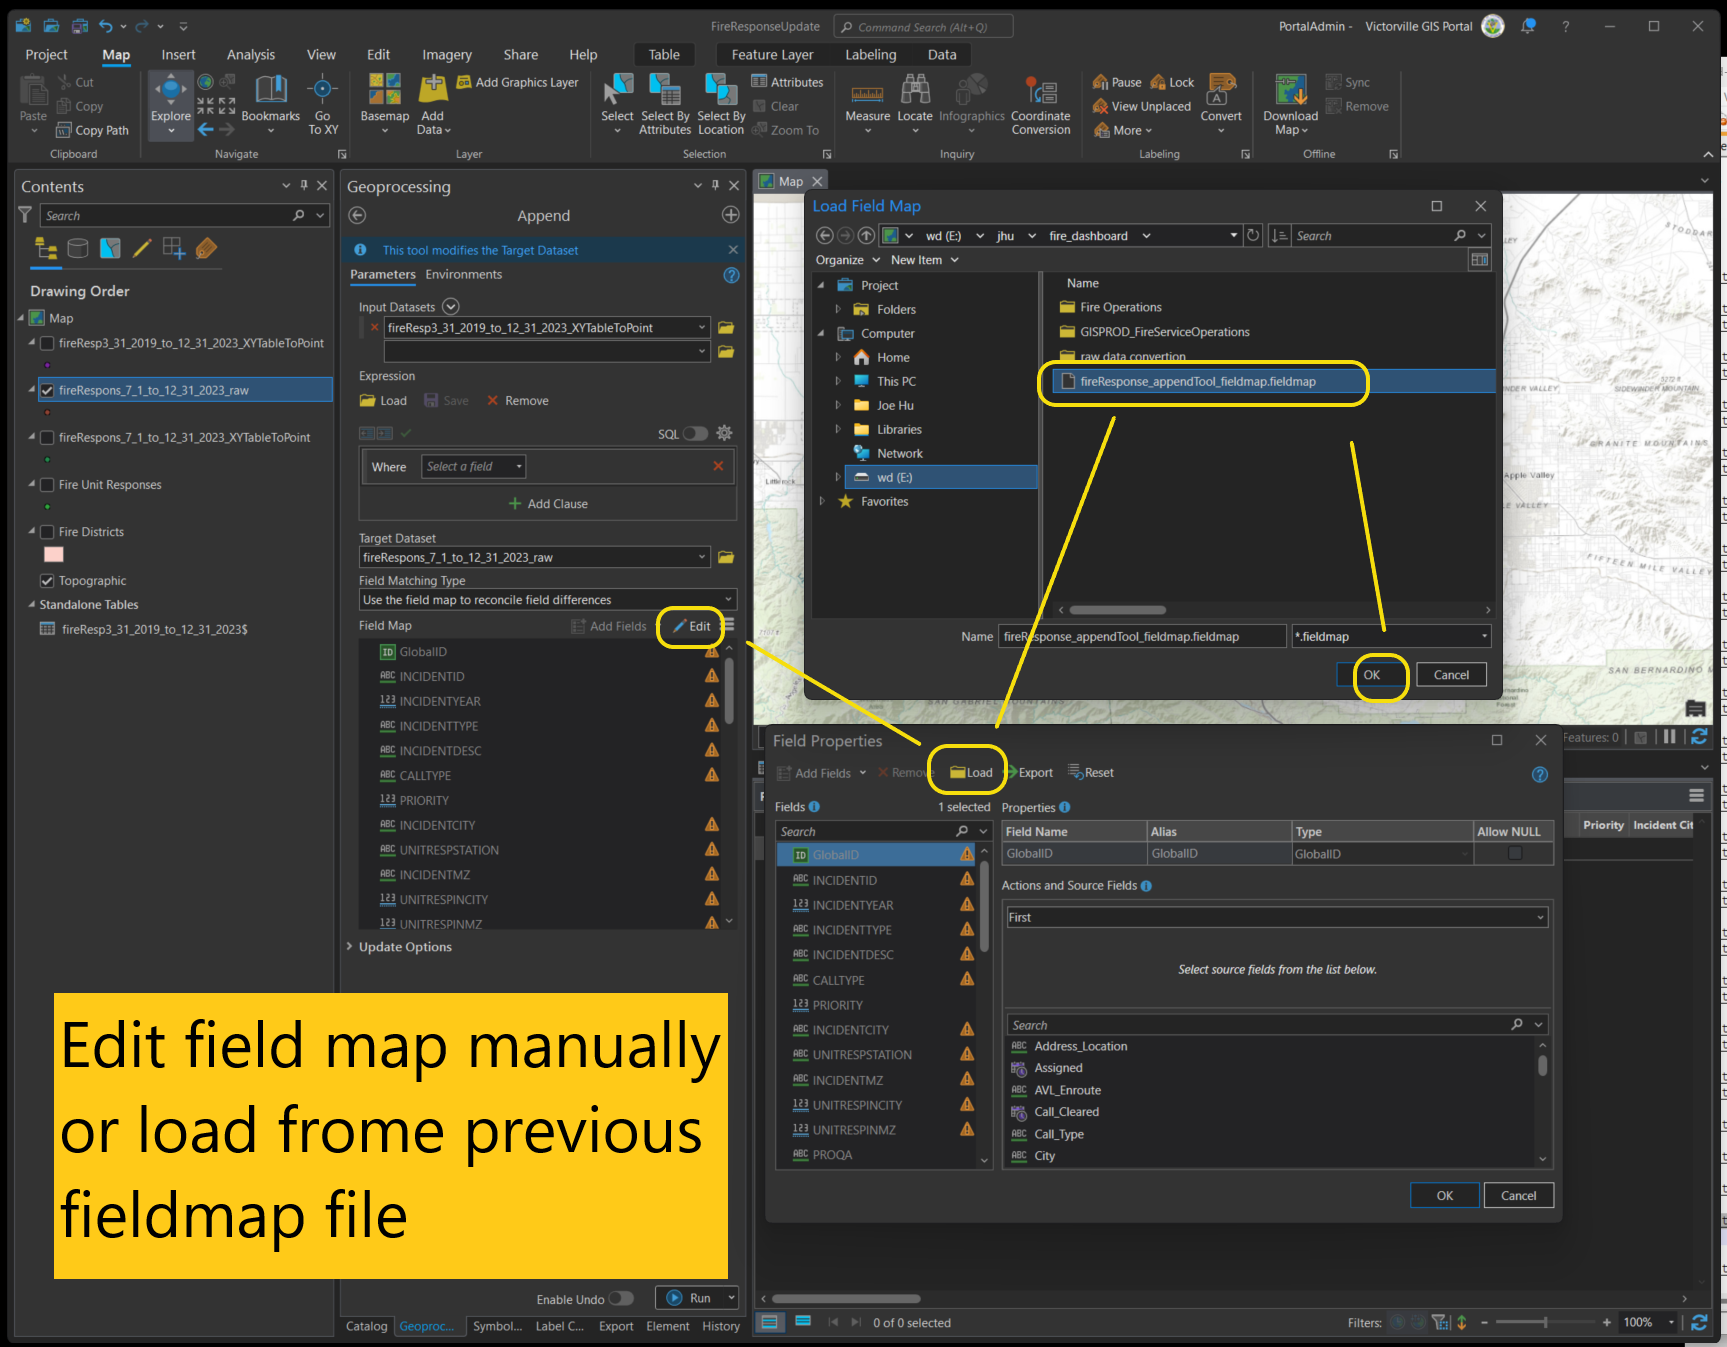
Step 4.1
Edit field map manually or load frome previous fieldmap file
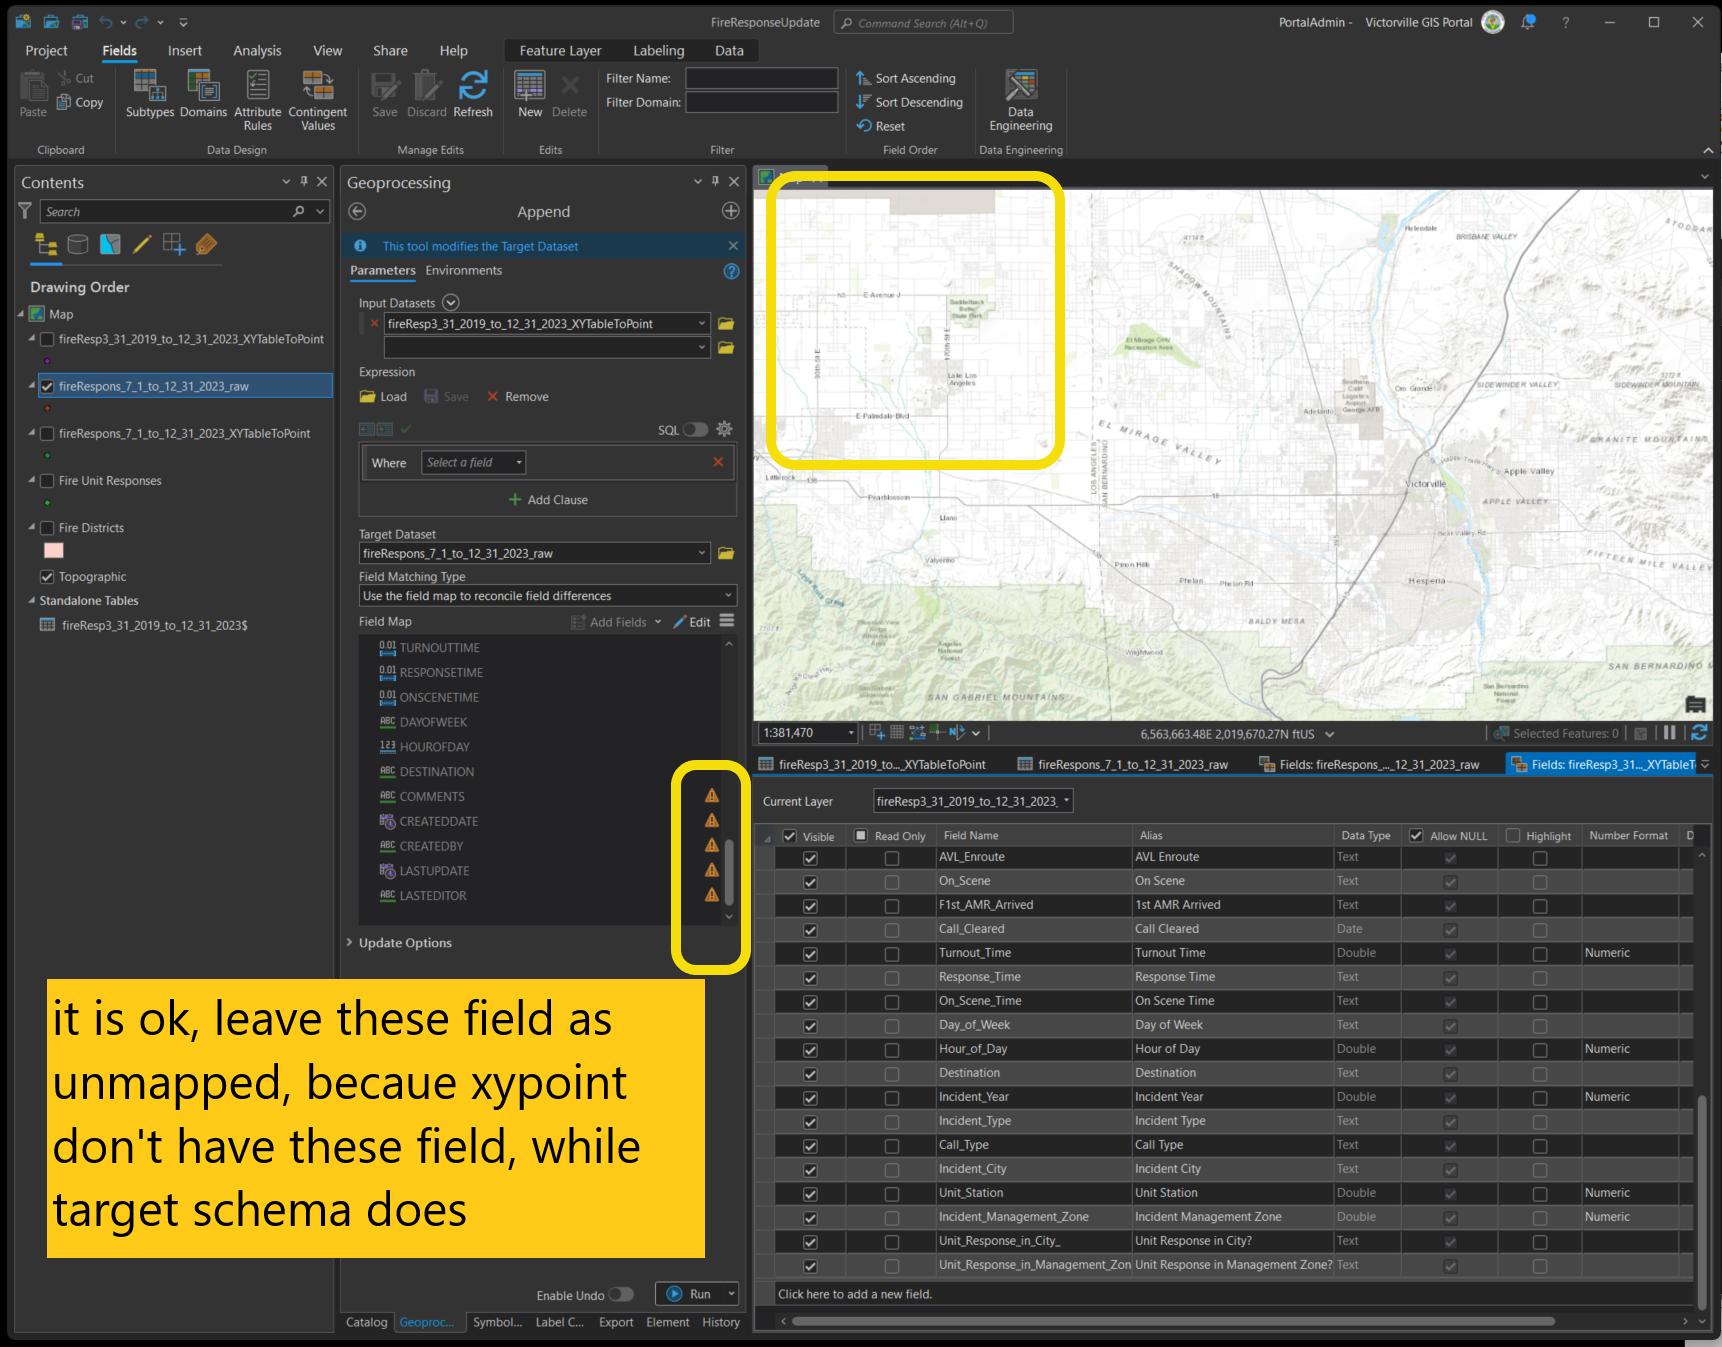
Step 4.2
it is ok, leave these field as unmapped, becaue xypoint don't have these field, while target schema does
Step 4.3
Step 6
Must do it in xxx_raw layer
Process turnout time, response time, on screen time (part 4) 911 firstwatch see https://transparentgov.net/cleargov1/1466/turnout-time-response-time-screen-time-part-911-firstwatch
Step 7
Must do it in xxx_raw layer
adjust call type see
https://transparentgov.net/cleargov1/1473/adjust-call-type-fire-or-medical-part-5-911-firstwatch?show=1473#q1473
Final steps to upload data to remote server
Step 15
Truncate remote SQL server ArcSDE table, use Truncate table tool or Run SQL query in SQL studio works the same, either way.
Step 16
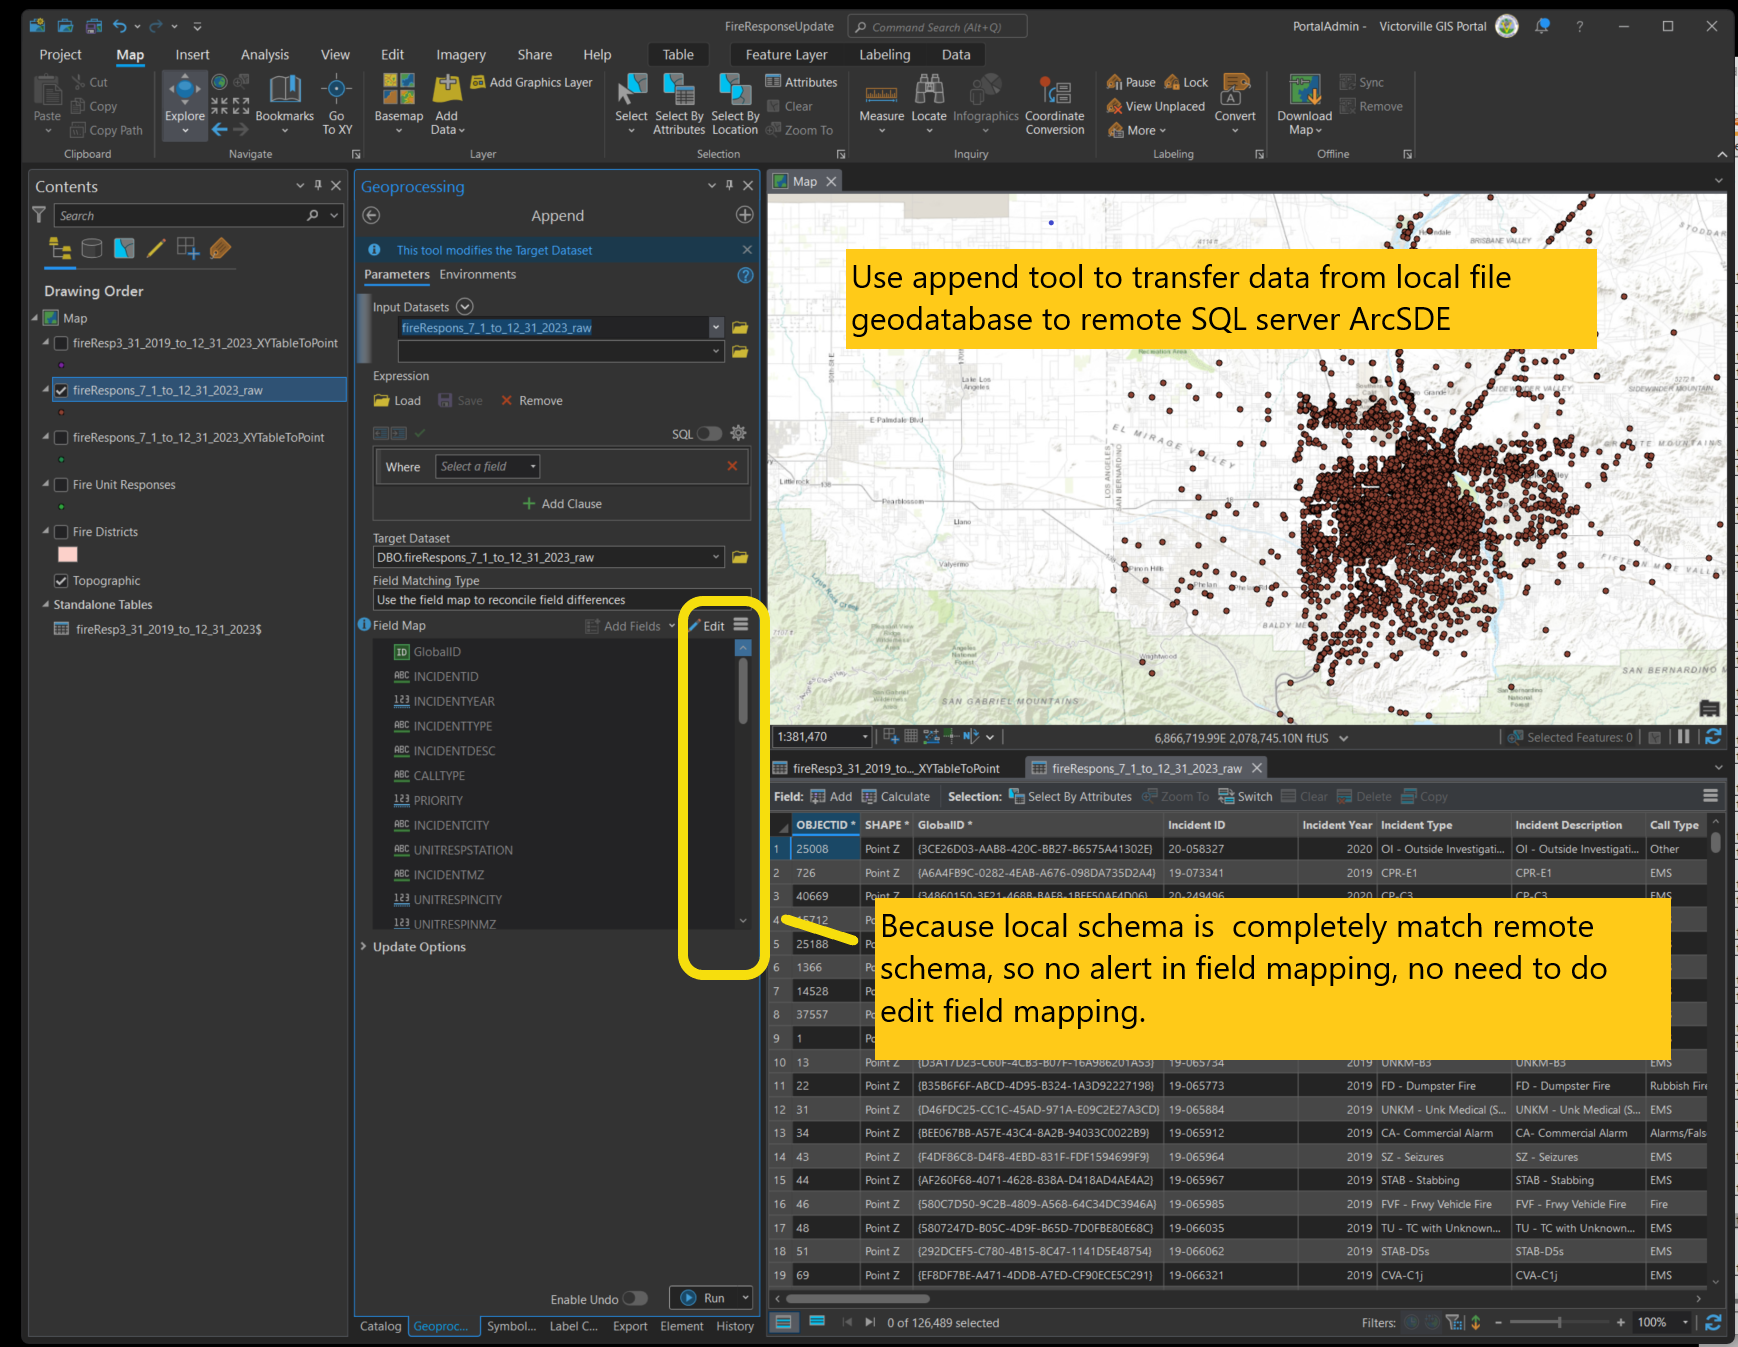
Use append tool to transfer data from local file geodatabase to remote SQL server ArcSDE
Step 16.1
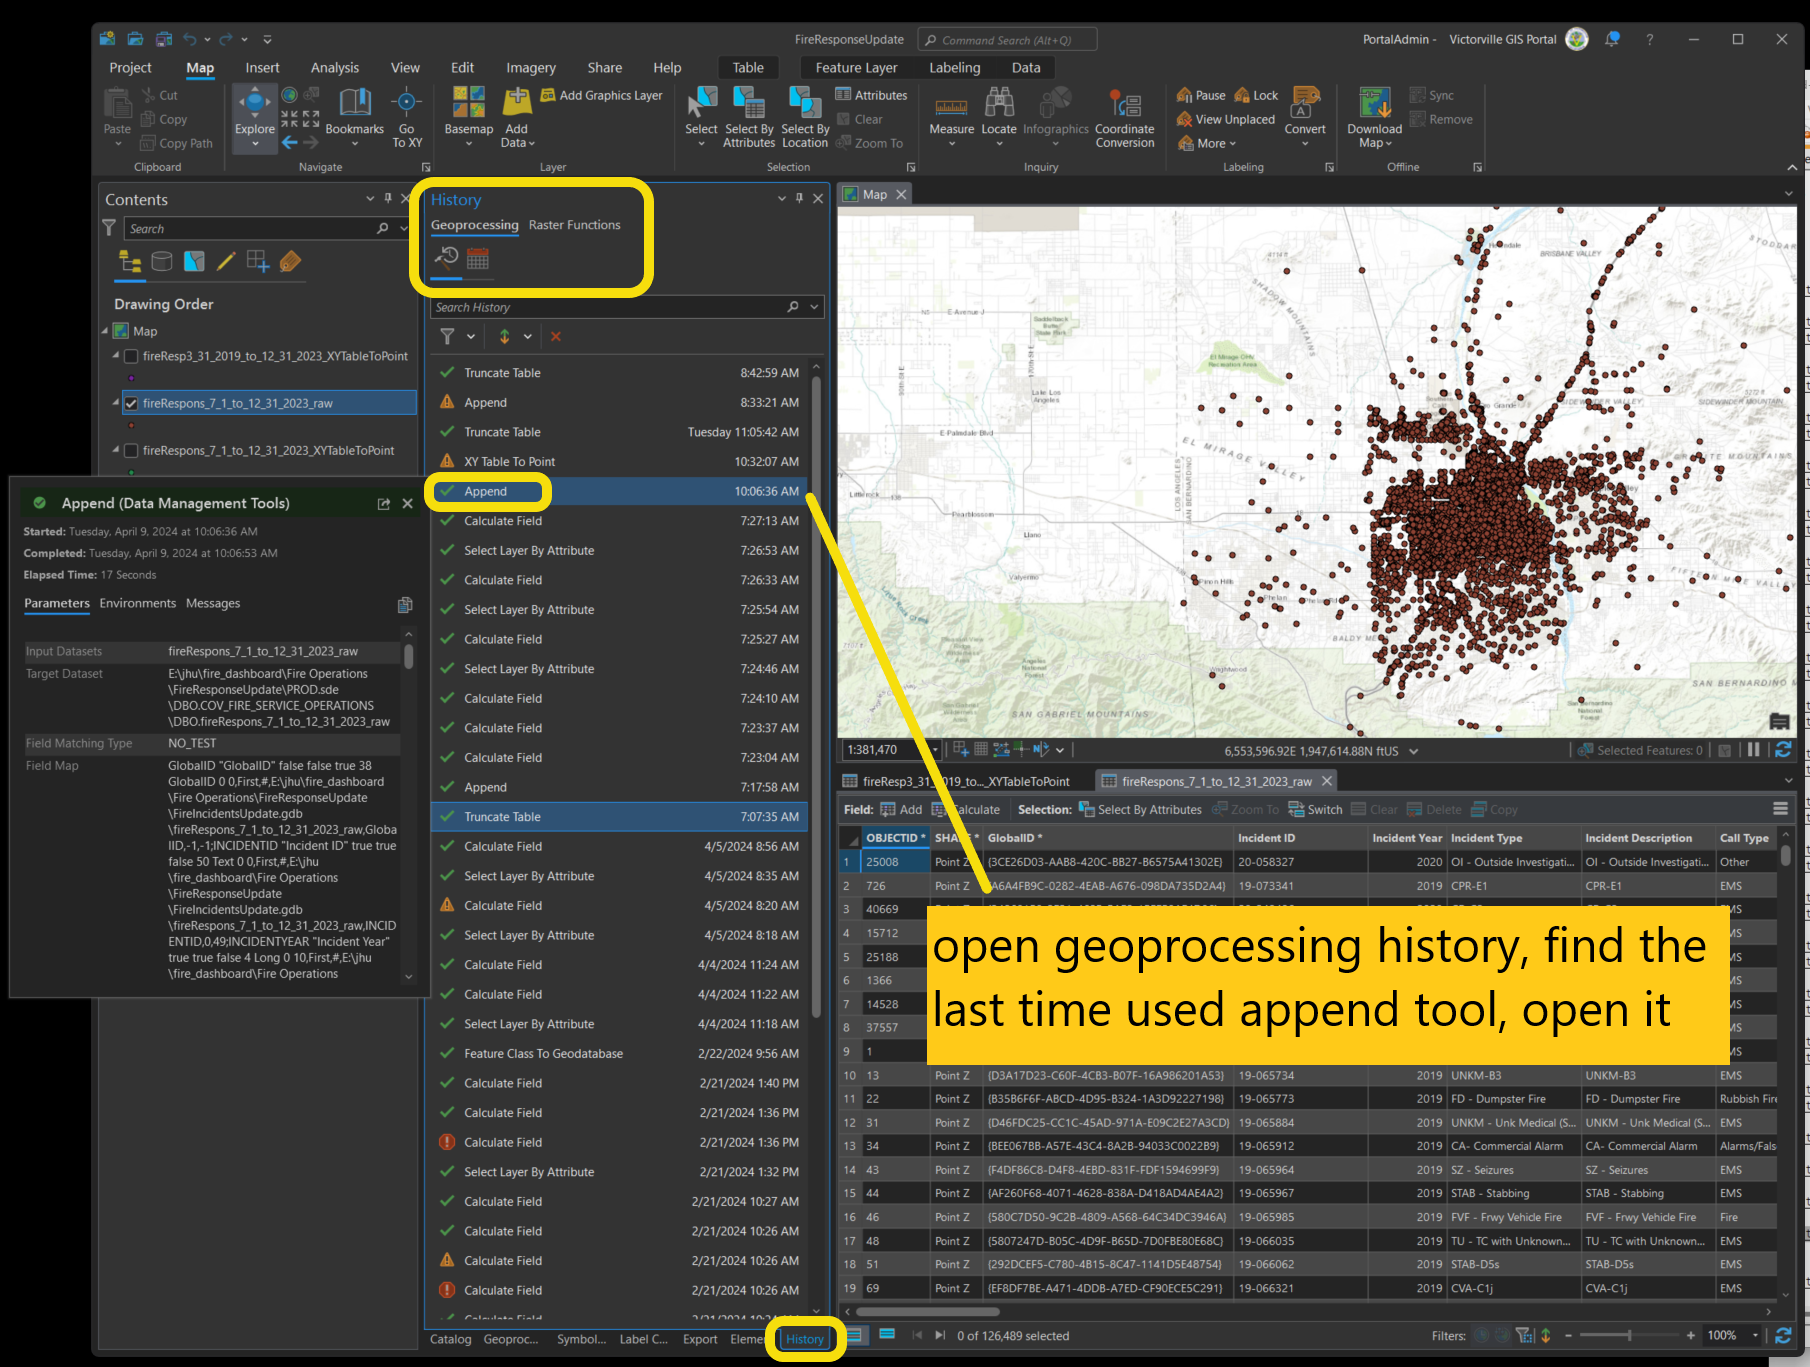
open geoprocessing history, find the last time used append tool, open it
Step 16.2
Use append tool to transfer data from local file geodatabase to remote SQL server ArcSDE
Because local schema is completely match remote schema, so no alert in field mapping, no need to do edit field mapping.
Step 17
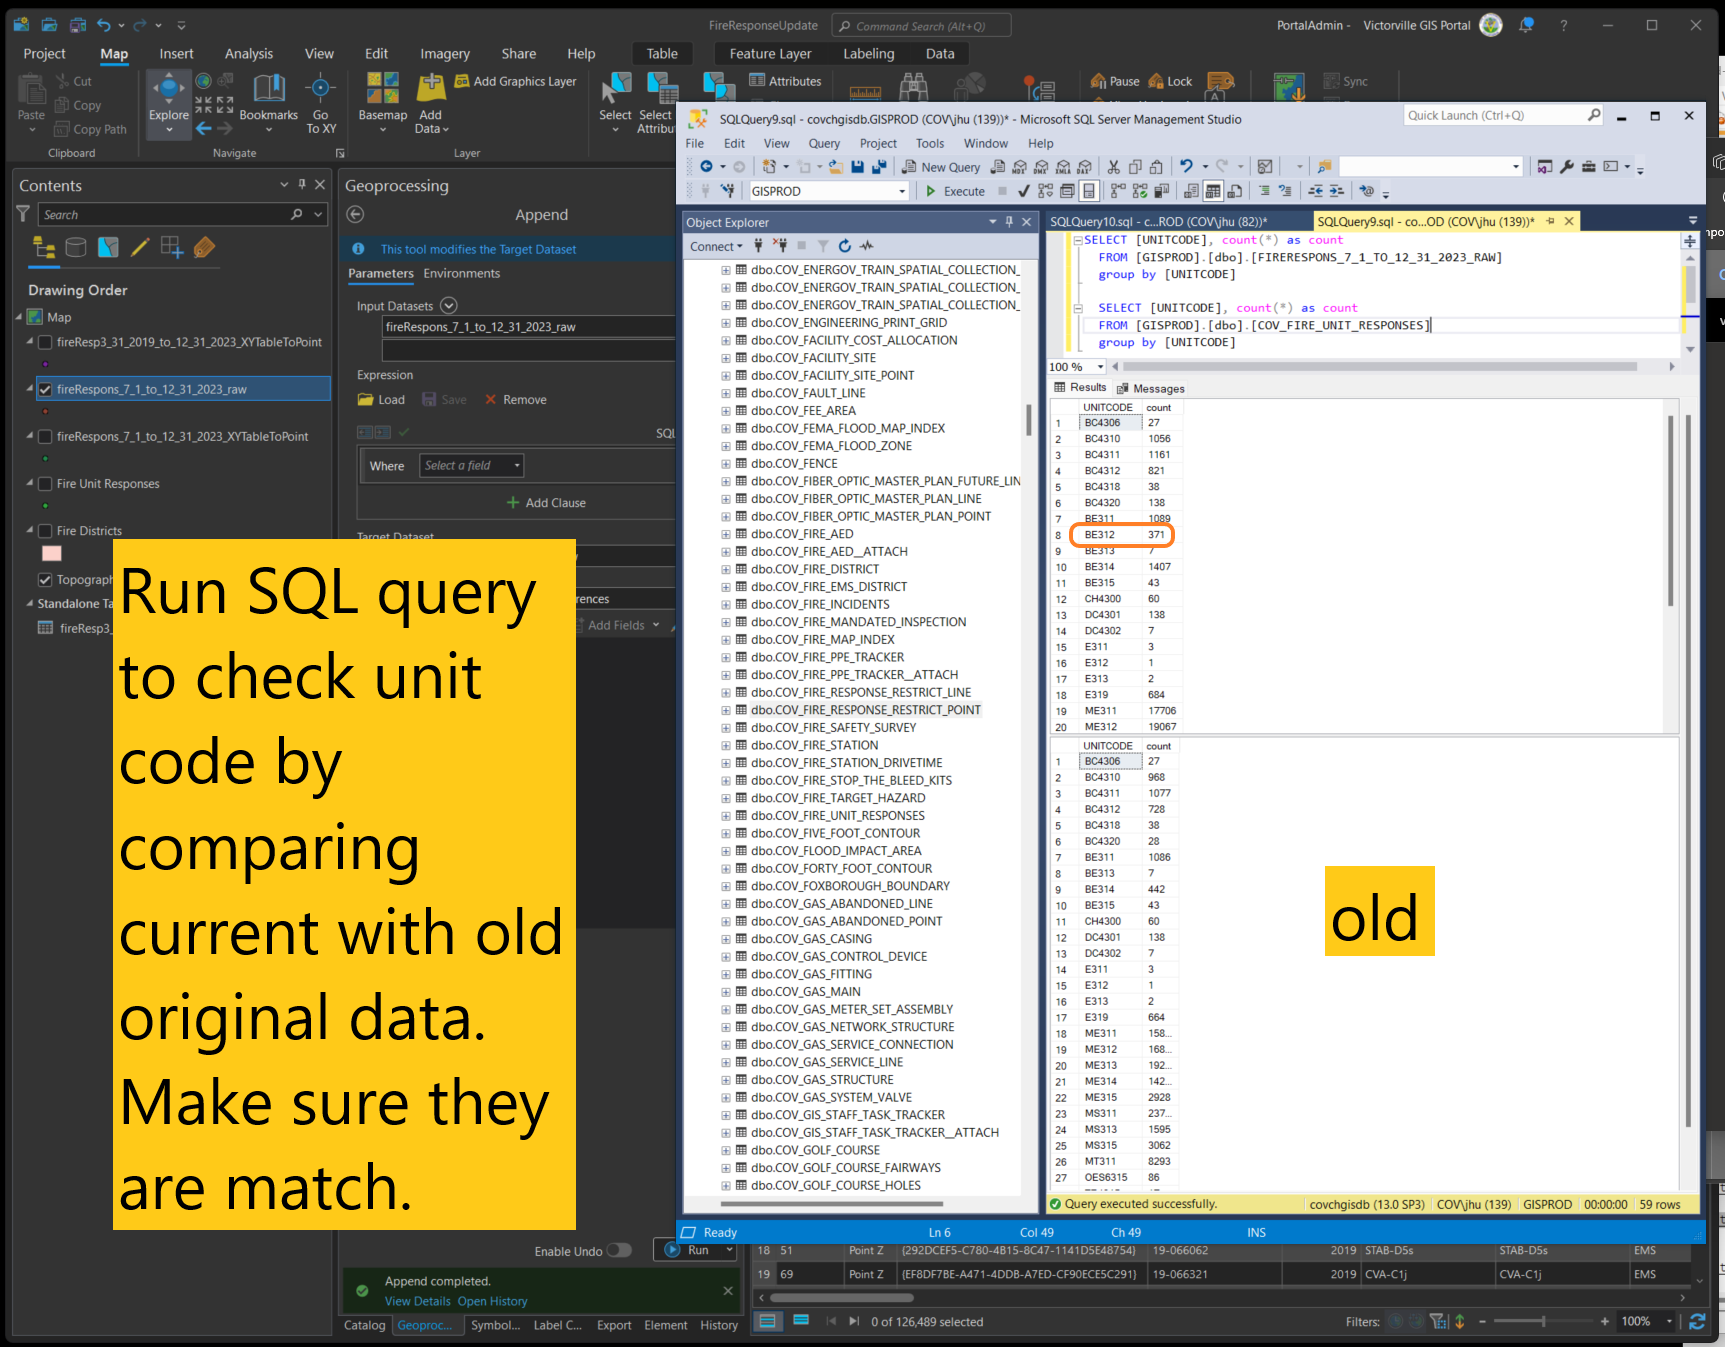
Run SQL query to check unit code by comparing current with old original data. Make sure they are match.